Bulgogi and Bokkeumbap
1/8/2022 | 24m 53sVideo has Closed Captions
Korean Marinated Beef and Kimchi Fried Rice; and a primer on sesame products.
Test cook Dan Souza makes host Bridget Lancaster Beef Bulgogi (Korean Marinated Beef). Testing expert Jack Bishop gives a primer on sesame products. Test cook Keith Dresser shows host Julia Colin Davison a recipe for Kimchi Bokkeumbap (Kimchi Fried Rice).
Problems with Closed Captions? Closed Captioning Feedback
Problems with Closed Captions? Closed Captioning Feedback
America's Test Kitchen is presented by your local public television station.
Distributed nationally by American Public Television
Bulgogi and Bokkeumbap
1/8/2022 | 24m 53sVideo has Closed Captions
Test cook Dan Souza makes host Bridget Lancaster Beef Bulgogi (Korean Marinated Beef). Testing expert Jack Bishop gives a primer on sesame products. Test cook Keith Dresser shows host Julia Colin Davison a recipe for Kimchi Bokkeumbap (Kimchi Fried Rice).
Problems with Closed Captions? Closed Captioning Feedback
How to Watch America's Test Kitchen
America's Test Kitchen is available to stream on pbs.org and the free PBS App, available on iPhone, Apple TV, Android TV, Android smartphones, Amazon Fire TV, Amazon Fire Tablet, Roku, Samsung Smart TV, and Vizio.
Providing Support for PBS.org
Learn Moreabout PBS online sponsorship♪♪ ♪♪ ♪♪ ♪♪ -Today on "America's Test Kitchen," Dan makes Bridget beef bulgogi, Jack talks all about sesame products, and Keith makes Julia kimchi bokkeumbap.
It's all coming up right here on "America's Test Kitchen."
♪♪ -Today, we're making the Korean classic, bulgogi.
I love this dish.
It translates to "fire meat."
You know it's going to be good.
It's so easily customizable, and it's packed full of flavor.
And Dan's here, he's going to show us how to make a great version at home.
-So this is one of my favorite dishes, and the first time I had it was well over a decade ago.
My friend, Song, made his grandmother's recipe for me, and I was just totally smitten.
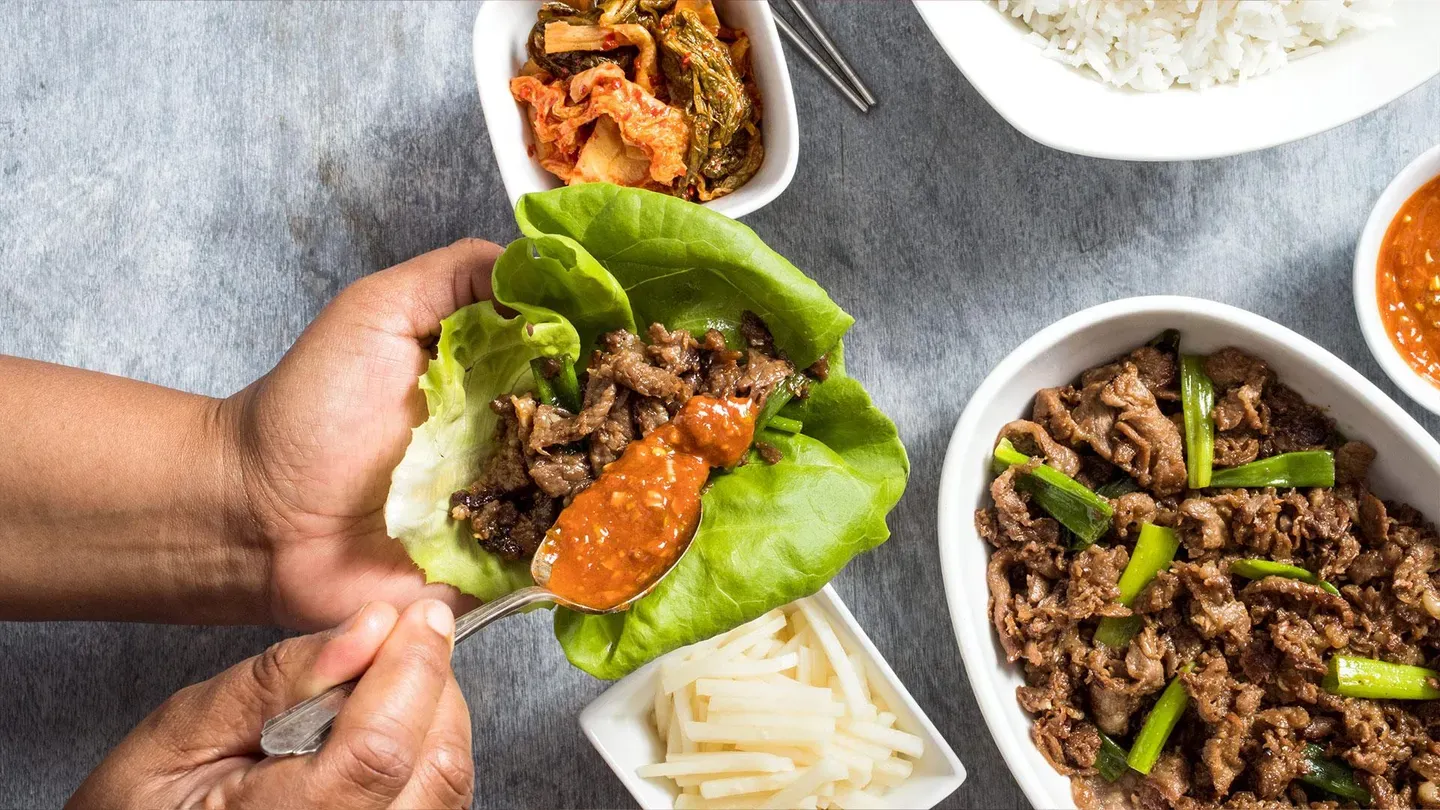
It's this gorgeous, thinly sliced beef, really well seasoned, and it's wrapped in a lettuce leaf.
Pop the whole thing in your mouth, and just, like, it's perfect.
-Grandma cooking is the best cooking.
-It's the best kind of cooking, and one of the reasons that it's so flavorful is you make this sauce called ssamjang, and it is built on two really delicious fermented pastes.
We're going to start with the whites and light green part of four scallions, and these are just minced thin.
And then, we have a 1/4 cup of doenjang.
So this is fermented soybean paste, and it's packed with umami, savoriness, and some good salt.
This forms the backbone of this sauce.
The next one is gochujang.
So they're both "jangs," which is a fermented paste or sauce in Korean food.
They're so savory, and they add complexity to tons of dishes.
So this is a tablespoon of gochujang.
This adds sweetness and spice.
Again, a little bit more savoriness, as well.
-Right.
-We're going to loosen this up with just a tablespoon of water.
We've also got two teaspoons of sugar, two teaspoons of toasted sesame oil.
Some really nice nuttiness there.
And then, finally, one minced garlic clove.
So much flavor.
So we're just going to stir this together.
Beautiful.
This is lovely with pork, and you see it served with all different kinds of meat.
Today we're going to make a beef bulgogi, and it's going to be so good with it.
-Okay.
-So I'm just going to set that aside.
And then, let's pop over here, and we're going to get to the beef, but first, we're going to make a pickle.
In Korean cuisine, there are so many pickles, whether they're quick ones or fermented ones like kimchi.
We're going to make one of the simplest ones, which starts with a cup of rice vinegar.
And this is the unseasoned kind.
-Okay.
-We're going to season it ourselves.
2 tablespoons of sugar, and then, 1 1/2 teaspoons of salt.
So a super simple pickling brine.
That is all dissolved.
So we're going to use radish for this.
And, normally, Korean radish, it's a really big white one.
This is a daikon, which is similar and works really well in this recipe.
It's a little bit more readily available here in the States.
-Right.
-So this is one pound.
First, I'm just going to peel it.
So I'm just going to lop off the tip and the end there, and we're going to make matchsticks out of these.
1 1/2 inches here on the length.
And we go about 1/4 inch.
-I love this kind of Hadrian's Wall you're building here.
-[ Laughs ] It's like I'm a dealer at a casino.
-Exactly.
-So now that I've cut them in one direction, I basically just stack them up.
Run your knife through and finish them up.
And I'm going to transfer them over to our quick pickle brine.
Just stir these.
Make sure that they're all submerged in our brine there.
So these can be ready in about 30 minutes, which is awesome, truly quick pickle, but they can hang on the fridge for up to 24 hours and they'll just get nicer.
-Fabulous.
-So I'm going to set this aside also.
Now we can finally get to our beef.
-That is gorgeous.
-So, beautiful rib eye.
Now, if you have a good Korean market near you, they sell gorgeous, thinly sliced steak.
It's like machine sliced.
-Right.
-And absolutely go for that.
It is made for it.
It's wonderful.
If you don't have access to it, this is a really easy way to do it yourself, and you can obviously choose the cut that you want.
Rib eye is really nice and tender, takes up flavor really nicely, and it's a favorite for this, for sure.
So I'm just going to do a little bit of trimming.
Basically, take off this big piece of fat here.
But you don't have to do much.
A little bit of that would be nice in there.
-One of the great things about rib eye, it has all that marbling in it.
-Exactly.
There's so much flavor and fat in there.
So I'm just going to cut this into about 1 1/2-inch-wide pieces.
So it's really going to only be about three pieces here.
We're going to go back on the plate.
Beef like this that's fresh, It's really hard to slice thin, it's squishy.
So we're actually going to freeze it for a bit.
Not until it's solid, but until it is firmed up a little bit.
35 to 40 minutes.
♪♪ Okay, so our steak is nice and cold.
You can check out how firm it is.
-Okay.
-Right?
Proof?
-Right.
-So that's great.
It's going to make it so much easier to slice.
And my goal with slicing here is to actually do it this way so that we're cutting against the grain as we go down.
And just go as thin as we can.
They don't have to be perfect, and if some are small, it doesn't matter.
You won't notice in the final dish, -Thinness is more important.
-Exactly.
-Okay.
-Just go as thin as you can.
So I'm just going to keep going into all of these pieces have turned into nice thin strips.
-Mm.
-All right.
And that is it.
-Beautifully done.
-Nice pile of beautiful rib eye.
And nice and thinly sliced.
This is not a super traditional step for bulgogi, but you do see it a lot in Chinese stir-frys and a trick that we use in the test kitchen a ton, and that is to give it a baking soda treatment.
So I've got a tablespoon of water in this bowl and I'm adding a quarter teaspoon of baking soda.
This is a really powerful tenderizer, and it works immediately, unlike marinades that can take a long time to actually do their work.
-Right.
-It makes it so the proteins don't bond together as tightly.
Keeps it really, really tender.
So I'm just going to stir this together.
Helps hold on to a lot more moisture, too.
Great.
So I'm just going to transfer this over to the bowl and stir to coat.
Now, while this sits for five minutes, I'm going to go wash my hands for the next step.
Okay, so now it is time for our marinade, where we're going to get a ton of the flavor into this beef.
We're going to start with a 1/4 cup of onion.
We've got a 1/4 cup of sugar, 3 tablespoons of soy sauce.
More and more flavor.
I have 4 cloves with garlic.
Tablespoon of toasted sesame oil.
-Mm!
-So that shows up in the ssamjang and then also in the marinade.
And then, finally, 1/4 of a teaspoon of pepper.
So I'm going to process this for about 30 seconds until it's nice and smooth.
All right, that looks beautiful.
Okay, so we're going to go right into our beef here.
-Oh!
-So I'm just going to stir this to combine and make sure all of it is covered in that nice marinade.
-Mm!
It's smelling like bulgogi.
I mean, it really is that potent aroma.
-Sweet and savory.
-Absolutely.
-That awesome onion in there.
-Mm!
-Beautiful.
Okay, great.
Clean up a little bit, and then it'll be time to cook.
-Okay.
-All right.
It is time to cook.
So we've got our beautiful marinated beef.
I've got 2 teaspoons of vegetable oil heating over medium-high heat.
You want just until shimmering.
It doesn't need to be smoking.
-Okay.
-And we're going to get all of our beef in at once.
So we're going to cook this without moving it, just on this first side here for about a minute just to get a little bit of browning.
Now, this version in the skillet, as opposed to being out on the grill, it's not about getting a ton of browning on it.
-Right.
-We have so much flavor from the marinade, but just allow it to a little bit, and then we'll stir after that.
-Sounds good.
-All right.
So it's been about a minute.
Now I'm going to stir.
And our goal here is, over the next three or four minutes, is just to stir and get everything cooked through so we see no more pink beef.
But you don't need to go any further than that.
If you do go a little further, that baking soda is going to help protect it.
-Right.
But you're not looking to turn over every single piece of beef?
-Nope.
-Okay.
-Like, we'll get some browning, like that, which is great, but the rest of it doesn't need to go.
Okay, so I see no more rosy beef in there.
That means we are done.
The final part is those scallion greens.
-Right.
-So cut in about 1 1/2-inch pieces.
Just for 30 seconds.
That way, they retain a little bit of crunch.
Obviously, they're beautiful.
But a little bit more texture in there, as well.
-Lovely.
-Beautiful.
Okay, so this is done.
I'm going to get it out of here and onto my platter.
Oh, looks so good.
-That looks brilliant.
Oh, my gosh.
-So good.
-[ Inhales deeply ] -It is time to eat.
And this is one of the most fun and interactive things to eat, as well.
So, the way that Song showed me how to do it, and we can do it together... -Okay.
-...is start with a beautiful piece of red leaf lettuce and then a dab of our ssamjang.
And you know, you can control how much space and intensity you want based on how much you add.
And then, just a little bit of beef.
You don't need a lot.
A little scallion.
And then, he really loved it with a little bit of sliced raw garlic.
Just wrap it all up into a tidy little package.
-Little bundle.
-A little bundle.
And then, you just pop it all in.
-The whole thing?
-The whole thing.
-You go ahead.
Mm.
Mm!
-Mm.
-This is why I love bulgogi so much.
Every bite is so intense.
-The ssamjang adds so much complexity and punch.
And then, that garlic, I love that.
Just -- It's a sharpness that kind of washes it all.
It's really nice.
-And of course, you got the pickle?
-Mm-hmm.
-Some rice.
-Really nice pickle to kind of refresh in between bites.
-Mm.
That is so refreshing.
-Mm-hmm.
-Pickle-y, refreshing, crisp.
I'd keep that in my fridge all the time.
-Oh, yeah.
Mm.
-I think you and I have a few more bundles to make.
-We definitely do.
-Thanks, Dan.
-You're welcome.
-Stupendous.
And if you want to make beautiful bulgogi at home, make a quick ssamjang, cut semi-frozen pieces of rib eye into thin slices, toss the steak with water and baking soda and then a potent marinade, cook the steak for just minutes in the pan.
And the best part?
Assemble them into little bundles any way you wish.
So, from "America's Test Kitchen," a beautiful, brilliant beef bulgogi.
Fight you for that one.
-I got my -- got my own.
-I'll fight you for that one.
[ Both laugh ] -A lot of fighting going on here.
-Yeah, yeah.
♪♪ -Sesame seeds are some of the oldest foods known to mankind.
Archeologists tells, 6,000 years ago, our ancestors were cultivating sesame seeds and making things from them.
Probably the most valuable thing about sesame seeds is their high oil content.
Now, if you remember one thing from this segment, I want you to think high oil content means high propensity for rancidity.
So that means keep it in the fridge if it's oil or tahini or in the freezer if its seeds.
Now let's dig in.
First up, we have the raw sesame seeds.
Now you'll see, in some markets, they are sold either hulled or unhulled.
The difference is the hulls are a little bit bitter, so we prefer to buy them with the hulls already removed.
Won't ruin a recipe if you end up buying -- especially in a natural food store, they sell them with the hulls on.
But if you have a choice, get them already hulled.
In addition to the familiar sort of tannish color, in a lot of Asian recipes, you will see black sesame seeds.
Just a different variety.
It's a little bit more bitter.
That black color is not only stunning, but does have a little bit more flavor.
They're really wonderful in a lot of Japanese recipes.
Toasted sesame seeds.
So this is probably the way that they're most versatile because it brings out their nuttiness.
You can actually buy them already toasted.
I keep a container of toasted sesame seeds in my freezer.
I pull them out.
I don't have to toast them myself.
If you are using raw sesame seeds and you're going to have to toast them yourself, do it over medium-low heat in a skillet 'cause they will burn in a flash.
Never, never in the oven.
So, in addition to the seeds, probably the most useful thing is the oil.
It can be extracted from raw seeds, and it's basically like a cooking oil.
High smoke point, you can use it like vegetable oil, except it's really expensive.
And so, therefore, most of the sesame oil, in fact, really the only sesame oil that we keep here in the test kitchen is the toasted sesame oil.
So this is our winner.
It's a company called Ottogi.
And it's kind of lightly toasted.
We found in the tasting that the brands that were really dark kind of had some smoky charcoal notes that could be overpowering.
And perhaps my favorite thing here on the table is tahini.
This is used throughout the Middle East, and this is a paste made from pureed ground sesame seeds.
Now, these are also toasted, and again, as with the oil, we said lightly toasted, kind of gave you a more round flavor.
This is Ziyad, which is our winner from Lebanon, and it is our top choice for tahini.
So there you have it.
After 6,000 years, we're still using sesame here in the kitchen.
♪♪ -Like all forms of fried rice, kimchi bokkeumbap is straight up home cooking.
It's cozy, unfussy, and rooted in the spirit of using up what you've got on hand, which, in this case, is leftover rice and kimchi.
Now, this recipe is easily varied by what other bits you can find in the refrigerator.
So, today, Keith's going to show us the basics.
-Yeah, so I love the unscripted nature of this dish, but what I really, really love is the combination of the main components.
You have this chewy rice punctuated with little bits of salty hot and sour cabbage.
-Mm-hmm.
-It's actually the perfect marriage of ingredients.
So we're going to start with the kimchi here.
-Mm-hmm.
-I want to strain off the cabbage kimchi from the juice.
That juice gets soaked into the rice later on... -Oh!
-...and flavors it through and through.
So we need to add them at two points.
So we're using cabbage kimchi based with napa cabbage that has been salted and left to ferment in the ground.
And it's flavored with gochugaru, which is a Korean chili flake.
-Mm-hmm.
-There's also some scallions in here.
Sometimes you find carrots.
The world of kimchi is quite vast.
So I'm just going to press this down a little bit just to get some of that juice out of there.
We don't have to be too picky about this.
And I'm going to cut the kimchi into 1/4-inch slices.
This kimchi smells wonderful.
-It does.
-Spicy.
A little funky.
Just take a couple of pieces.
Stack it up.
-Mm-hmm.
-Okay.
Gonna transfer this over to a bowl.
-Mm-hmm.
-We have about 1 1/4 cups of kimchi, and I want 1/4 cup of our juice.
Now I'm going to move on to our ham.
I have two slices of deli ham here.
I'm gonna cut this into 1/4-inch pieces.
Now, if you want to make this vegetarian, you can skip the ham.
We like the smoky bits that the ham adds.
You can add other meats.
You could add Spam, you could add shrimp.
It's really versatile, really what you want, what you have in your refrigerator.
-Right.
That's some thick-cut ham.
-Yeah, it's about 1/4 inch.
-Nice.
-And we're going to cut it into 1/4-inch pieces.
Excellent.
Now, scallions.
-Mm-hmm.
-These are going to do dual purpose here.
I'm going to take off the roots.
I'm going to slice these thinly.
And the whites are going to go in the base with the ham and some onions, and the greens are going to be for garnish.
Okay, so we're getting up to the green.
-Mm-hmm.
-So I'm just gonna take this, put it with our ham.
-I could watch you cut scallions all day.
-Oh, well, get another bunch, and I can do another bunch.
-Yeah.
[ Laughs ] -Okay, so one last thing that we're going to do before we get to cooking, we're going to toast some gim.
This is a Korean seaweed, much like Japanese nori.
-Mm-hmm.
-And this is going to be a final garnish on the dish.
It's going to add a little bit of umami, a little bit of crispness to the final dish, but we have to toast it before we cut it.
So I'm just going to take a sheet and tongs, turn this burner on low.
We don't need a lot of heat.
It's going to darken a little bit.
-Uh-huh.
-And it'll start to crinkle up a little bit, and it actually will shrink some.
So this is just an 8-inch sheet.
It'll start to become aromatic, too, as we go along here.
Can see it shrink a little bit.
-Mm-hmm.
-Okay, you can start to smell it.
-Yeah.
-It's shrunk a little bit.
That's perfect, so I'm just going to shut the burner off.
Now, you could cut this with a knife.
I find kitchen shears to be much, much easier.
So I'm just going to cut this into strips, and you can hear how brittle it is now.
-Mm-hmm.
-Before we toasted it, it was a little bit moister and a little bit more flexible, but now that it's toasted, it's nice and dry.
It's like arts and crafts.
-[ Laughs ] -Now cut these strips crosswise into little smaller strips.
Again, this doesn't have to be perfect.
Last couple of cuts, I'll leave those there so I don't cut my fingertip off.
Now we can cook.
-All right.
-Okay.
Are you ready to cook?
-I love how you have everything laid out here.
-Yeah, it's a stir-fry.
You want to make sure that you have everything ready to go when you start cooking.
-That makes sense.
-So we'll start over here.
I have a 12-inch skillet, and this is over medium-high heat with 1 tablespoon of vegetable oil.
We're going to get that up to shimmering, and then, we're going to add our aromatics to that.
So I have our scallion whites and our ham that we cut earlier.
I'm also going to add one large onion that's been chopped -That is a large onion.
-Yeah, it's about 1 1/2 cup of onion.
So I'm just going to stir this around, make sure everything is well coated with oil.
So we're just going to let this go for about six minutes.
What we're looking for is that onion to soften, and the ham's going to start to brown around the edges.
It's been six minutes.
You can see that our onion is softened.
We get a little bit of color on that ham.
That means that we are ready to move to the next stage.
So we're going to add our kimchi, 1 1/4 cups of kimchi, our kimchi juice.
Also going to add a little bit of water.
Traditionally, when this is made, it's made with fairly old kimchi that's softened over time.
Since our kimchi is a little young, I want to soften it a little bit more before we add the rice.
Going to add 4 teaspoons of gochujang, 4 teaspoons of soy sauce, and 1/2 teaspoon of black pepper.
The kimchi is going to add a lot of flavor, but the gochujang and the soy sauce, they'll add a little background hint of savoriness that's going to be really nice here.
So we are just going to let this cook in here over medium-high heat until that kimchi becomes translucent and softens a little bit.
Take about four to six minutes.
We'll come back after that.
-Okay.
-The kimchi is nicely softened.
It smells wonderful, does it?
-It smells amazing.
Oh!
-It's about ready to get better because we're going to add our rice.
I have 3 cups of day-old short grain rice.
-Mm-hmm.
-If I can ask you to turn that down to medium-low.
-Okeydoke.
-So now what we want to do is we want to fold this rice in here, and we want this rice to absorb all that great kimchi liquid.
It's important to use day old rice here.
The reason why, it's going to allow us to cook that rice without it becoming mushy, but more importantly, that rice is going to soak up all of that great kimchi juice.
You can see now all that kimchi juice is being absorbed by that rice.
It's going to be perfumed and flavored throughout.
-Okay.
-Ooh!
-We've gotten all that juice incorporated into the rice.
-Mm-hmm.
-It's taken a little while to get that nice and evenly incorporated.
Now I'm going to add some toasted sesame oil.
4 teaspoons.
-Mm!
That's a lot of good flavor.
-Nice nuttiness.
-Mm-hmm.
-And one more tablespoon of vegetable oil.
-Now we're frying.
-Now we're frying.
I'm going to turn this up to medium-high and we're gonna let this go, and what we're looking for is the rice is going to start to stick to the bottom of the skillet, which means it's time to eat.
-So sticking is a good thing?
-In this case, yes.
-All right.
So, when making fried rice, you can't use rice that's freshly cooked.
You have to use rice that's cooled overnight.
Here's why.
When rice is first cooked, the individual grains absorb water, causing the starch granules to swell and soften, which makes the rice moist and tender.
If you try to fry the rice at this point, it will simply release some of the water, which then cools down the pan, so you can't fry properly.
It will also caused the rice to stick together in a mushy mass.
When you allow the cooked rice to cool, however, the starch firms up and the rice becomes dry, not because water is evaporating from it, but because the water is locked inside the firmed-up starch.
Now, when we fry it, the grain stays separate and dry to the touch, making it possible for each grain to get coated with oil and flavor.
After several minutes, the heat softens the starch again so that the grains become chewy and soft enough to eat.
And that's why it's essential to use cooked rice that's cooled overnight.
-It's been four minutes, and you can hear the rice crackling in the bottom.
-Yeah!
-And it's starting to stick around the edges.
I think this is ready to get it out of the skillet.
I'm just going to transfer this over to a nice serving platter here.
Doesn't that smell wonderful?
-It does.
Smells incredible.
I'm really looking forward to eating this.
-Want to get every last bit out of the skillet.
-Oh, are you going to get all those crispy bits that are right along the edge.
-Yeah, there are some little crispy bits here that's really going to be great.
Okay, so we could garnish this and eat right away.
-Mm-hmm.
-Which would be fine.
But I have one step.
I'm going to fry some eggs for us, which is my favorite way to eat this dish.
So I have an 8-inch nonstick skillet here with a teaspoon of vegetable oil.
We're just going to let that heat up until it's shimmering.
While that's happening, I'm going to add some salt to two eggs.
I'm going to ask you for the pepper, We want to crack them in a bowl before we put them in the skillet.
You don't want to futz around cracking eggs into the skillet and breaking the yolks and stuff like that.
So if you crack your eggs into the bowl even before they hit the skillet, you don't have to worry about that timing.
Okay, our oil is shimmering, and now it's time to cook our eggs.
I'm going to add a teaspoon of butter.
Just helps with color.
-Yep.
-I'm going to put our eggs in the skillet.
-Mm-hmm.
-Like so.
Now I'm going to cover this.
One minute.
-Mm-hmm.
-What the lid's going to do, it's going to trap the heat in there and cook the top of the egg so we don't have to flip it over and break those yolks.
-Yeah, it's a great method for frying eggs.
-While that's happening, I'll portion out our rice.
I can't wait to eat this.
It smells really fantastic.
-Oh!
So nice and steamy.
-Okay.
I think it's been one minute.
It's time to slide this off the heat, and it's going to go about 15 seconds because you want a soft-cooked yolk here, right?
-Yes.
-Okay, so wait 15 seconds.
-[ Chuckles ] Not long.
-Okay, it's been 15 seconds, and those yolks are perfectly cooked.
Slide one on to yours.
-[ Chuckles ] Nicely done, sir!
-And we'll put our toasty gim there.
And our scallion greens.
-Yes, please.
And I have a tablespoon of toasted sesame seeds that we'll also add to the top here.
-This is beautiful.
-Isn't it beautiful?
-Yes.
All right.
Oh, first, right for the yolk.
-Yes.
-[ Chuckling ] Oh!
Hello!
Mm!
Mm-hmm.
Oh, this is my kind of food.
Little bit of spicy, all those textures.
You get the sesame seeds, the gim, the chewiness of the rice, the crunchiness of the kimchi.
And the flavor.
That sesame was kind of surprising.
You put the sesame oil on.
-Yeah, and it's not that much, but it just is a background note that kind of compliments the rich rice.
-Yeah, it's lovely.
This is just so satisfying.
-And the texture of that rice, that chewy short grain rice... -Uh-huh.
-...with that little bit of crispness from the kimchi.
It's a perfect pairing.
-Goodness, I could eat this all day, Keith.
-It really is a fantastic dish, isn't it?
-Yeah, thank you.
-You're welcome.
-If you want to make this classic Korean dish, use both kimchi and the kimchi liquid.
Cook the aromatics before adding the cold rice to the pan, and top with a fried egg.
From "America's Test Kitchen," a great method for making kimchi bokkeumbap.
You can get this recipe and all the recipes and product reviews from this season, along with select episodes, at our website, americastestkitchen.com/tv.
♪♪ Goodness, Keith, I could eat my own weight in this stuff.
-Yeah, my mouth is burning, but I can't stop eating.
-[ Laughs ] ♪♪ ♪♪


Support for PBS provided by:
America's Test Kitchen is presented by your local public television station.
Distributed nationally by American Public Television